 [1]Doo-Doo Bag How-To
Skill Level: Easy – minimal to no sewing
Materials Required
1 fat quarter (1/4 yd) lightweight fabric of your choice
12 inches elastic string or 1/8 inch elastic
1 empty toilet paper tube or paper towel tube cut to 3 inches
Low Temp Hot Glue and Glue Gun
1 small snap clip with swivel ring – lobster clip, lanyard clip, any type will do. You can even use a tiny carabiner.
4 inch piece of coordinating 1/4″ ribbon
Disposable animal waste bags or plastic grocery bags (See video below for how to fold)
You get up early and let Friend out. She does her duty so off you go for a walk. A block from home, she’s scoping out the parkway for a spot to squat. Now, you’re left holding the bag as the neighbors look on. Problem is, you don’t have any bags, so the duty remains, and the neighbors scowl as you walk on shaking your head shrugging silent apologies.
Really?
It’s inevitable. You’re going to need to do your civic duty with the dooty. Sure, you could buy a bag dispenser, but you know I’m going to show you a better way.
This project is so easy, it’ll blow your mind. The best part is you don’t need more than literally a scrap of fabric. For my project, my local hobby store had canvas shoe kits on clearance for .79. I grabbed onto that. I’ve got plenty left over and it cost me next to nothing.
You can use toilet paper tubes or paper towel tubes. You’re going to cut it, so it’s irrelevant.
Here we go.
Start by measuring from the end of your tube, marking at 3 inches around. With sharp scissors, cut to length.
To measure and cut fabric, lay your cut tube on one end leaving one inch on the open top edge. This will allow room to make an elastic casing on each side. Roll the tube with the fabric and overlap about a half an inch. Mark and cut for length and wrap.
 [2]
[2]
Using your iron, fold each side over ½ inch and press a crisp. Make sure you press wrong sides to create the casing.
 [3]
[3]
Lay elastic along both folds. Cut elastic leaving a couple inches overhang for each side. Press a ¼ inch narrow hem along one side. Glue or stitch down the hemmed edge. Carefully sew along the edge  [4]of the casing allowing room to insert elastic. If you’re confident, go ahead and put the elastic in and hold it as you sew to avoid catching in the stitch. This can also be glued. Do not glue or stitch the elastic. Do this for both sides.
** Optional: You can stretch the elastic as you sew. That way you won’t have ends to deal with. After sewing stitch down one end. Stretch the elastic, slightly, but not too tight. You want an opening that will allow you to put bags in but still not fall out. The drawback, however, is it makes attaching to the tube a little trickier. If you choose this method, I’d recommend using very narrow flat elastic.

Apply a bead of hot glue (I recommend low tempt so you can work with it) along the one of the unstitched sides. Carefully place on the tube from end to end. Apply additional glue to the rest of the tube exterior and carefully roll up, overlapping the ends, smoothing as you go. For the overlapping top, fold the raw edge under slightly and glue as with the first edge.
If you choose to not sew the elastic, feed the elastic into the casing. Take both ends and pull together slightly until the opening is just shy of the size of a quarter, Make a knot by tying both ends together at once. If you’re OCD like me, you want to tuck the knot into the casing. This is the bottom of your dispenser.
For the other end, place the ribbon through swivel part of the clip. Tie a knot with both ends together and glue the ends to the INSIDE of the tube where the elastic meets. Be careful not to glue the elastic. After the glue cools, stretch and tie the elastic together as with the bottom. Note that this is optional, you can just put the clip through the elastic and be done with it. I used ribbon because I’m fancy.
 [5]
[5]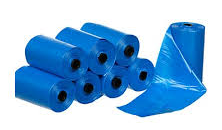 [6]
[6]
Insert bags. Attach to her leash.
Find dog.
Show her how hard you worked. Now, isn’t that precious!
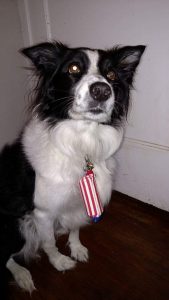
I’m not sure Lily is feeling the whole model thing! But they did come in VERY handy.  [7]
[7]
And now that we’ve welcomed Elsa into our family, I’ll be making another one just for her!
**Note: You can find dooty bags at most stores like Walmart and such. But if you really want to be thrifty, use plastic grocery bags. Fold bags in half, then again. Roll up tightly, adding a bag to the end each time. Here’s a great little YouTube video on how to fold grocery bags to self dispense. Of course, you won’t use the plastic dispenser, and you might want to fold them one more time, so the roll is a bit smaller to fit in the tube.