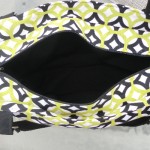
Recessed zipper on a bag
 I’ve had a lot of people ask about doing recessed zippers on bags — especially people who want to add a zipper to our diaper bag pattern. I decided to go ahead and whip up a tutorial. Whip up – hah! I spent some time mentally developing a game plan. It was a game plan that didn’t work out as planned.
I loved the fabric and was determined to complete this, so I took a breather and then undid a whole lot of stitches. Then I did some more thinking and a very obvious method came to me. If there’s one thing I’ve made a lot of, it’s bags. So this should have been about as obvious as possible. Anyhow, here it is! This recessed zipper is closed all the way around, compared to some that are open just a little bit on either end. This is a boxy bag. I’ll do one in the future for a bag that doesn’t have separate side panels, but rather uses two pieces and boxed corners.
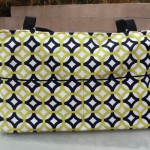
This bag is quite large and measures 19-3/4″ wide by 5-3/8″ deep by 12-1/4″ tall.
Here are some more views
(click for larger images)


Supplies


I had 1.25 yards of my outer fabric, and I had enough to fussy cut the pattern a bit, but keep in mind that my pattern repeat was small. If you have a large pattern you want to match or cut carefully, you might need more.
I had 1 yard of the lining fabric.
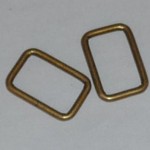
4 square rings for the straps
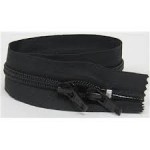
1 18″ purse zipper
2 yards Craft Fuse (interfacing)
Batting (sorry — I used scraps, so I didn’t measure it)
Peltex – this is a really stiff stabilizer. I used it only for the bottom of the bag. It is totally optional. I had some scraps lying around.
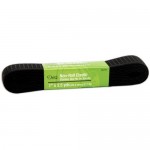
12″ (cut into two 6″ pieces) of wide black elastic. I used 1.5″ wide.
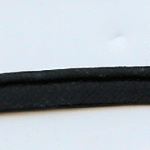
21″ of piping for the pocket (optional – if you don’t want to buy a whole package, but perhaps you have some leftovers handy)
Pattern
NOTE: I tried to cut my pieces so the pattern would line up. It’s not always perfect, but look to the front pocket as an example. Whether you want to do this or not depends on the print of your fabric. Just something to keep in mind.
You’ll need to cut the following pieces:
Outer bag
Front/back: 21″x13.5″ (WxH) – cut 2 from outer fabric
Sides: 6″x13.5″ – cut 2 from outer fabric
Bottom: 6″x21″ – cut 1 from outer fabric
Lining (below zipper)
Front/back: 21″x11″ – cut 2 from lining fabric
Sides: 6″x11″ – cut 2 from lining fabric
Bottom: 6″x21″ – cut 1 from lining fabric
Lining (above zipper)
Front/back strips: 21″x3.5″ – cut 2 from outer fabric
Side strips: 6″x3.5″ (WxH — all of these are, just a reminder) – cut 2 from outer fabric
Interfacing (Craft Fuse) – all of these are using the OUTER bag pattern pieces
Front/back pieces: cut 2
Side pieces: cut 2
Bottom piece: cut 1
Zipper panels (long): cut 2
Batting – use OUTER bag pattern pieces
Front/back pieces: cut 2
Side pieces: cut 2
Bottom pieces: cut 1 – ONLY if not using the Peltex
Peltex – optional
Bottom piece: cut 1 – trim it a bit to reduce bulk in seam allowances
Zipper panel
Long strips: Cut 2 each from lining fabric and outer fabric: 21″x3″
Zipper tabs: Cut 2 small rectangles 1.25″x1.75″ (the first number should be width of your zipper and zipper tape, in case you use a different type of zipper than I did.)
Straps
Cut 1 piece 4.5″x20″ – this will later be cut into four 5″ pieces
Cut 2 pieces 4.5″x28″
Front pocket
Cut 2 pieces 21″x7.5″ (WxH)
1/2″ seam allowances
Process
I have had several requests for inserting a zipper into our popular diaper bag pattern. I think that with the divider and all of the bells and whistles on that pattern, the recessed zipper is the best method for that. You can apply this process to that pattern, if you like.
****Feel free to skip this explanation and move on to the tutorial if you are just making this bag and not applying this to the diaper bag***
If you want to try to apply this to the diaper bag, I want to offer a little explanation to help you visualize things better. Think of the part of the bag that is above the zipper, on the inside, as part of the lining, even if it’s in the outer-bag fabric (like in this example). The whole section above and below the zipper, with the zipper panel in the middle, is all LINING. You’ll create this as one entity and then assemble the bag just as you would with a normal bag that doesn’t have a zipper. If you consider just the part underneath and inside the zipper as the lining, it might confuse you.
Create the outer bag
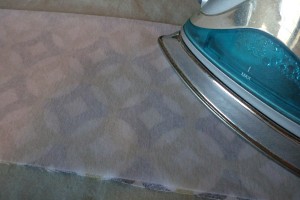
Apply your interfacing to your outer bag pieces (sides, front/back, bottom) and your upper zipper panels.
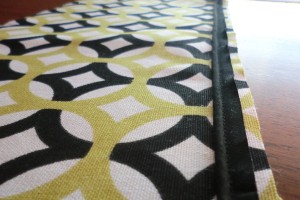
Apply piping on the outer pocket piece (the one that will face outward). You’ll want a final seam allowance of 1/2″, so set your piping in a bit so that you’ll get that seam allowance when you stitch just to the right of the piping. If you have a piping foot, this is a great time to use it!
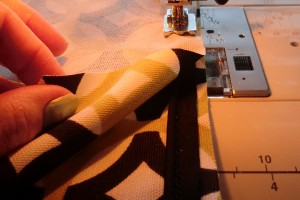
Place your other pocket piece on top of the first and use your piping foot to guide you along the piping as you stitch the pocket pieces together along the top, next to the piping (to the right of the piping).
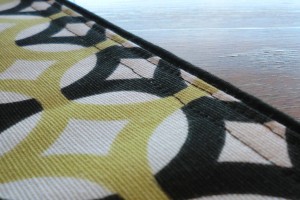
Flip your pocket right-side out and press. Your piping should be sticking out the top edge. Top stitch as desired. Incidentally, see how my stitching is a bit uneven in some spots? Sometimes with heavier woven fabrics, that happens. I find longer stitch lengths and a new needle help a lot. I didn’t have a new needle and mine looks a little jaggedy.
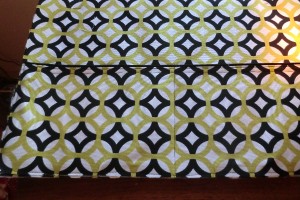
Place your pocket on top of your front outer piece. I did my best to line up the pattern. Baste all the way around the sides and bottom. Then stitch a line up the center, dividing the pocket.
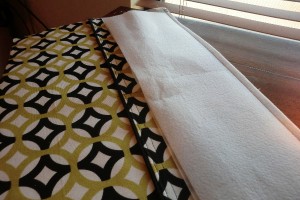
Attach the bottom panel by lining up one long edge and sewing it to the bag side piece. Then repeat on the other side … but first see the next step.
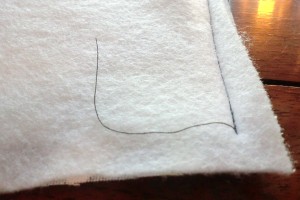
Sew leaving 1/2″ at either end. This will make it easier to sew the side panels later.
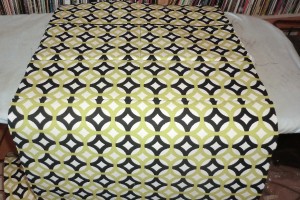
This is a picture of the front/back panels sewn with the bag bottom in between.
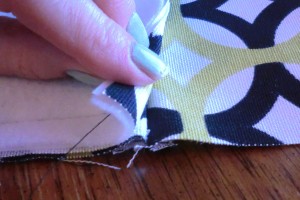
Line up a side panel on the edge of one front or back piece with the top edges aligned. The bottom edge of the side piece will go past the seam of the front/back panel where it meets the bottom panel. I tried to show this in the photo above. Also, you will start or stop sewing at this seam, but go all the way to the top edge.
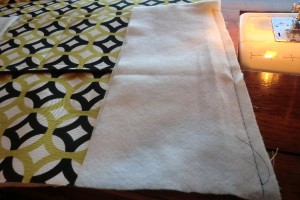
Above is a wider shot of the side panel stitched on. In this photo, the top of the bag is at the bottom of the photo, so it’s positioned upside down.
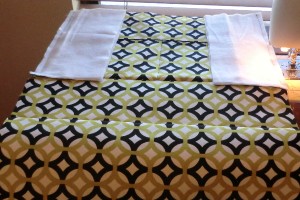
Sew the other side panel on the other side of the front piece.
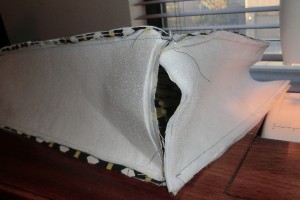
Sew the other side of each side panel to the back piece. Now just the bottom edges of the side panels are open, as shown. Go ahead and sew those shut, too.
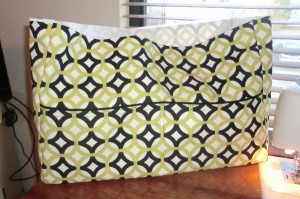
Turn it right-side out, and you’ll start to see what your bag will look like!
Create the mini-straps
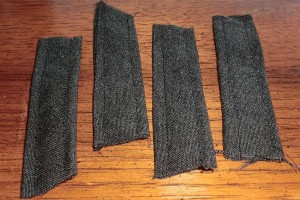
Use our non-turn strap tutorial to make the straps. For your mini-straps, which attach directly to the bag, you’ll make one longer strap (using the 20″ long piece) and cut it into four pieces of equal length.
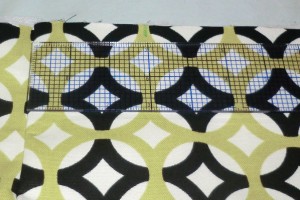
Measure 3″ from either side of the bag front/back and make a mark.
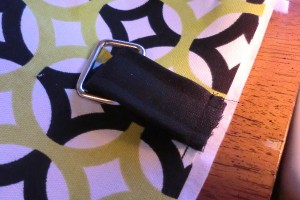
Attach the mini straps as shown by inserting through a square ring, folding in half and basting the raw edges along the raw edge of the top of the bag, where you made your mark. I aligned it to the inside of the mark I made.
Install the zipper
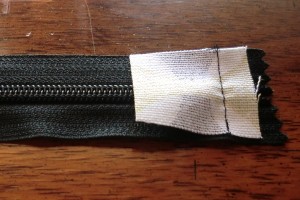
You’re going to make a small tab on either side of the zipper. Position your tab piece as shown and stitch close to the zipper start/end.
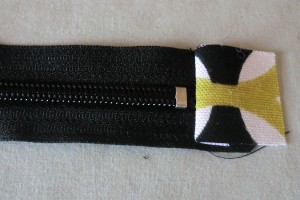
Turn over and press.
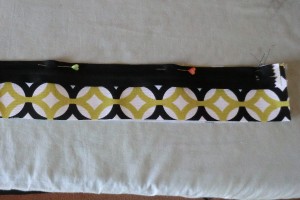
Next, take one zipper panel and with the right-side of the zipper facing the right side of the fabric, stitch along one edge. NOTE: technically, I’d like my zipper tab to reach the end of my zipper panel but it was a bit too small on each side. But the dimensions I provided above have accounted for that and yours should fit better. In the end, with seam allowances, it just didn’t matter on mine.
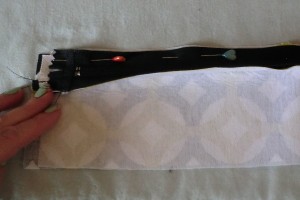
Place the other side of the zipper tape right-sides together on the other zipper panel and sew.
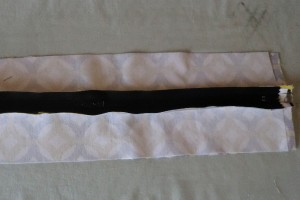
Press open. From the back, it looks like this (above).
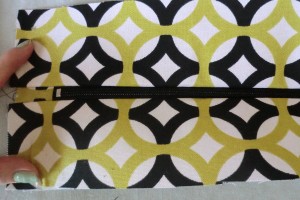
From the front, it looks like this (above).
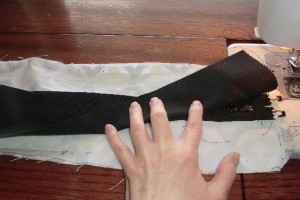
Do the same thing with the lining zipper panels, but you’ll be placing right side of lining to wrong sides of zipper tape. Position as shown above.
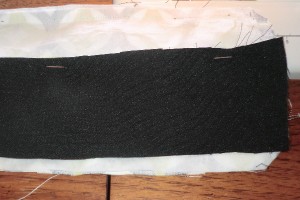
I know it’s kind of hard to tell the positioning from the photos…
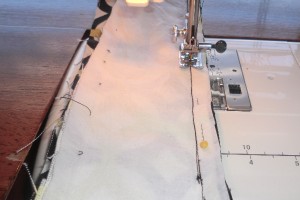
I like to sew from the other side so I can follow the previous line of stitching from where I sewed the zipper to the top panel pieces.
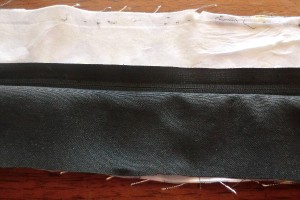
When you press the fabric back, you have a nice, neat edge along the inside of the zipper.
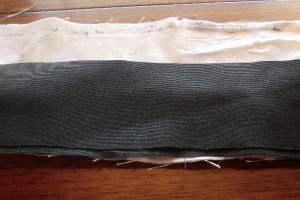
Add the other lining zipper panel to that top edge of the zipper tape and sew.
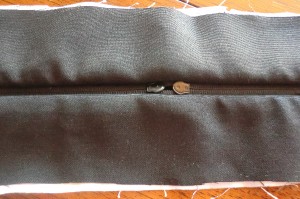
Now you have this from the inside. But it’s kind of floppy and baggy. We want to secure the fabric so it’s not getting in the way of the zipper.
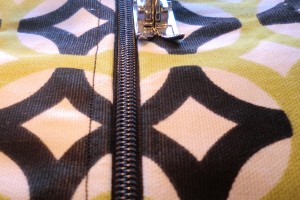
To do that, smooth the layers of fabric (I like to pin them on the raw edges to secure) and top stitch around the zipper.
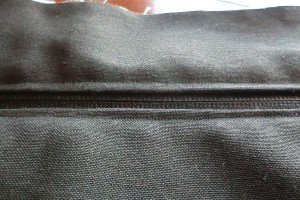
It will look like this from the lining side…
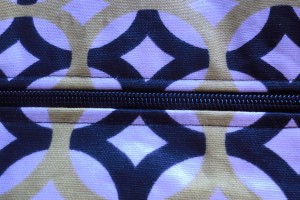
… and this from the top side.
Sew the lining
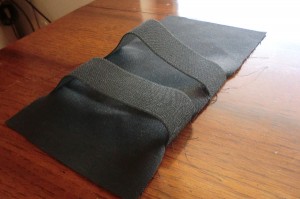
If you want, you can add some elastic to one of the interior side panels for a cup or bottle holder (I like to take reusable plastic cups with straws to work filled with ice water). I used thick elastic and basted it to one lining side panel as shown.
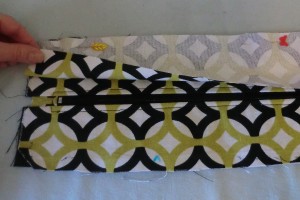
Although this fabric is the exterior fabric, the whole part with the zipper counts as the lining because it’s all inside of the bag. So don’t let that throw you off. OK, so take one of your small lining “front” strips and line it up with your zipper panel, right-sides together as shown.
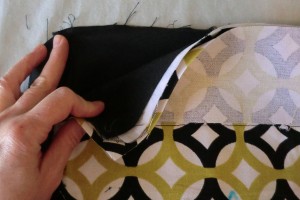
On the other side of the zipper panel, place your lining front/back piece. So, basically, you’re sandwiching the zipper panel between the two.
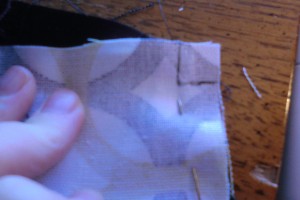
Sew the seam, but start/stop 1/2″ from either end. You might want to measure and mark this.
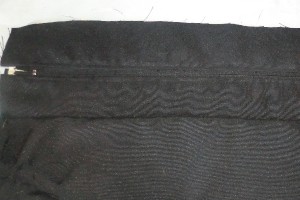
From the back, it will look like this. Repeat on the other side.
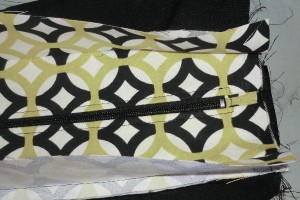
After doing the other side, it looks like this. See how those top pieces are going to stand up to create a bit of a box above the zipper later?
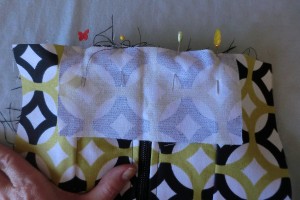
Now do your side pieces in the same way, sandwiching them with the zipper panel and lining.
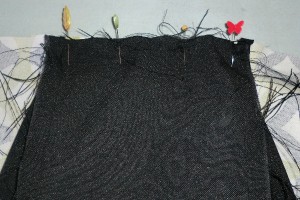
Here it is from the lining side. My fabric is really stringy because, if you recall, I had to take apart my project and redo some of it.
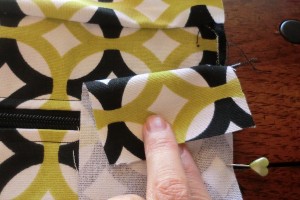
Remember to start 1/2″ from the ends, or in the case of the sides, you’ll sew from seam allowance to seam allowance.
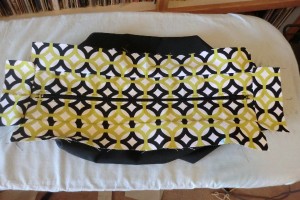
Press the pieces out. Now you have this.
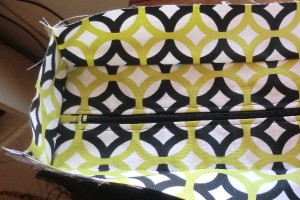
Now sew your side seams from top (patterned fabric) to bottom (lining) in one swoop. Then sew the bottom on — but leave a large section of the bottom open on one side for turning the bag right-side out in a minute.
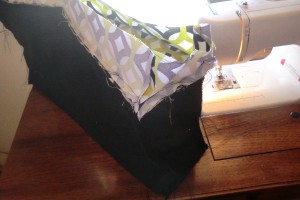
The interior looks like this. Leave it inside-out.
Attach the lining to the exterior
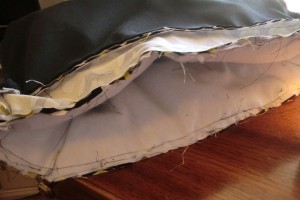
Your zipper should already be open; leave it that way. Stick the exterior inside of the lining. The lining is inside-out and the exterior is right-side out, so when you stick the exterior inside the lining, the right sides are together. You’ll pin around the top, lining up the side seams. Then sew all the way around the top.
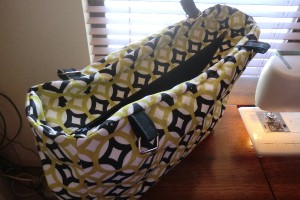
Turn the bag right-side out. It’ll look a little sloppy, but we’ll fix that.

Pull out the lining and press the seam allowance of the hole in and pin. Then sew close to the edge to close the hole.

Press the top of the bag and top-stitch around the top to keep the lining from rolling out and make it look nice and neat.
Attach the straps
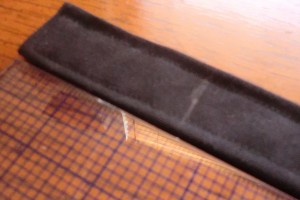
Make your other two strap pieces. You’ll need the edges to be finished, so use the non-turn strap tutorial again, but be sure to turn under the ends of the strap before stitching so that you have a finished edge on each end. Then mark 2.5″ from each end.
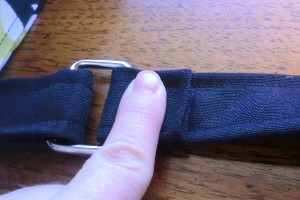
Loop the end of your strap through your ring and line up the end with the mark you made in the step above. Stitch. I did two rows — one along the stitching on the end of the strap and the other as close as I could get to the ring. You’ll want the folded edge to be on the inside.
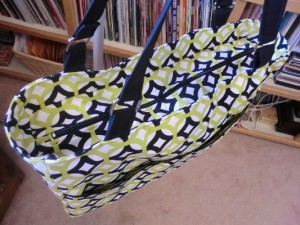
All finished!
Other views
