Turn a card table into a fun fort!
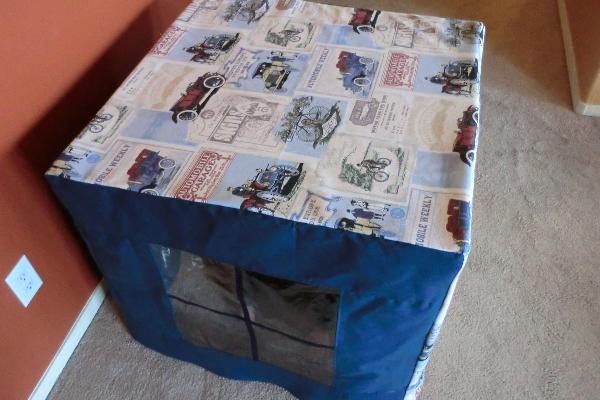
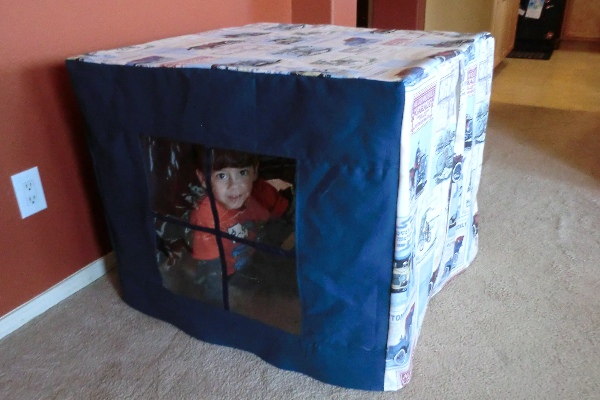
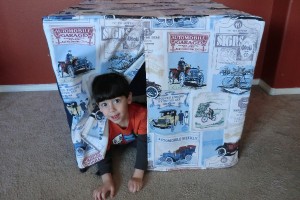 Take one of those cheap folding tables in your garage and make it into a play place for kids. This one even has windows to let in light (though, I must admit that I made them a bit large!).
I’ll give you the dimensions I used and also some tips so you can calculate yours if your table is a different size. Many run from 32″-37″. Mine was 33″ square.
Supplies


I mentioned above that my table is 33″ square. I had 2 yards of the Antique Sea fabric and 3 yards of the solid, with some left over. I used about 2 yards of ribbon (1/2″ is a good width, but it doesn’t have to be exact). I had 1/2 yard of plastic.
The pattern
 Here are the calculations I used to make mine, along with my exact measurements used as examples. The height of my table was 27.5″. I added .5″ for top seam allowance and 1″ for the hem = 29″. You can probably adjust quite easily from my final numbers listed below by just adding or subtracting the difference in the size of your table, but just for kicks, here is how I did the calculations:
The top panel is easy: width of table plus 1″ seam allowance. For mine: 34″x34″.
The back panel is the width of table plus 1″ SA plus height of table plus 1″ seam allowance. Mine is 34″x29″ (wxh).
The front panel consists of two overlapping pieces, so they need to be a big wider than half the width, plus include a little extra to hem the open edge. For mine, 33″ wide/2 pieces = 16.5″ + 1.5″ overlap = 18″ + .5″ seam allowance + 1″ hem = 20″x29″ (wxh).
The sides are most complex since they have the windows. I made my windows 18″x18″ (this was rather large, as it turns out!). That’s with seam allowances, so for purposes of calculations, consider the final window to be 17″x17″. The width of my table is 33″, so I took 33″ – 17″ = 16″ /2 (one piece for either side) = 8″ + 1″ seam allowances = 9″x18″ (wxh). So you need two pieces 9×18. Then you need two long pieces above and below the window. Your table height is 27.5″ – 17″ (window) = 10.5″/2″ (two pieces) = 5.25″.Therefore, your top piece is 5.25″ + 1″ seam allowance = 6.25×34 (hxw) and your bottom pieces is 5.25″ + 1″ hem + .5″ seam allowance = 6.75″.
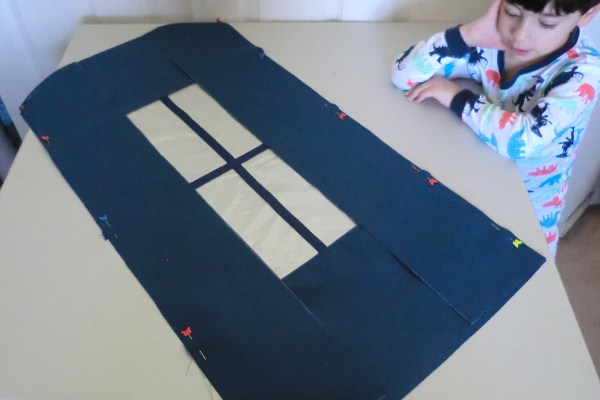
I will reiterate for simplicity. In my example, for a 33″x33″ table:
Cut 1 top = 34″x34″
Cut 1 back = 34″x29″ (wxh)
Cut 2 front = 20″x29″ (wxh)
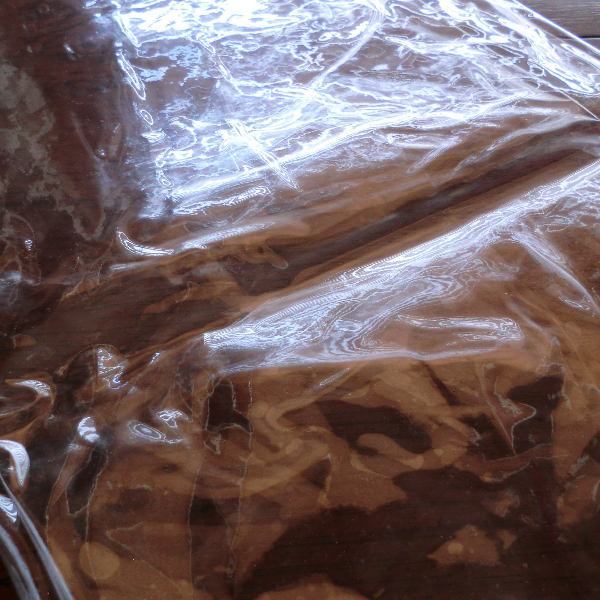
Cut 2 windows = 18″x18″ (from plastic)
Cut 2 side pieces = 9″x18″ (wxh)
Cut 1 above-window piece = 34×6.25 (wxh)
Cut 1 below-window piece = 24×6.75″ (wxh)
Process
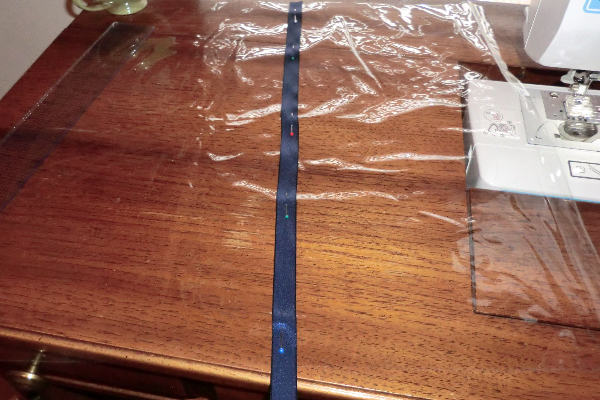
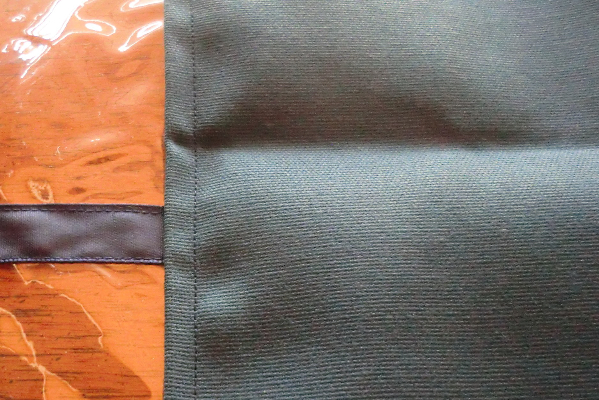
Cut four lengths of ribbon as wide as your window (two for each window). Run one ribbon centered down the plastic window.
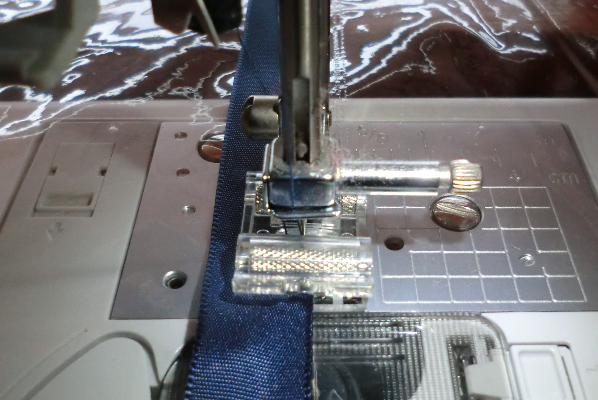
Stitch the ribbon to the plastic down either side. I used a rolling foot. If you have trouble with your presser foot sticking to the plastic, you might try one of these. I’ve also heard you can place Scotch tape on the bottom of your presser foot.
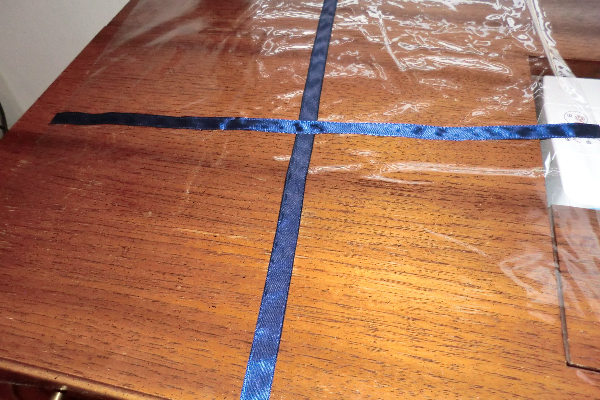
Stitch the other ribbon the other way so it’s forming a plus sign. Repeat on other window.
Stitch your window side pieces on either side of the window.
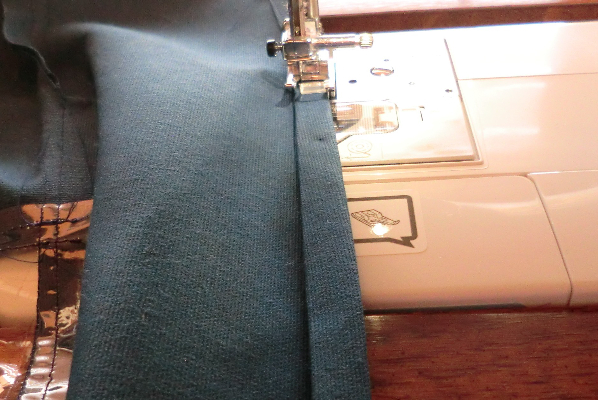
Flip the fabric away from the window and top stitch.
Add your top and bottom pieces and do the same.
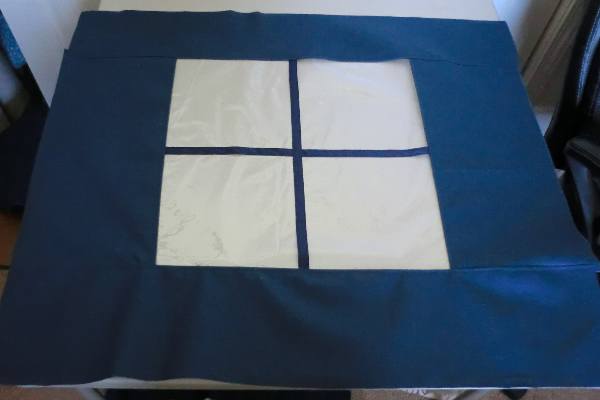
It will look like this. Repeat for other window.
Stitch one window piece on either side of your back piece.

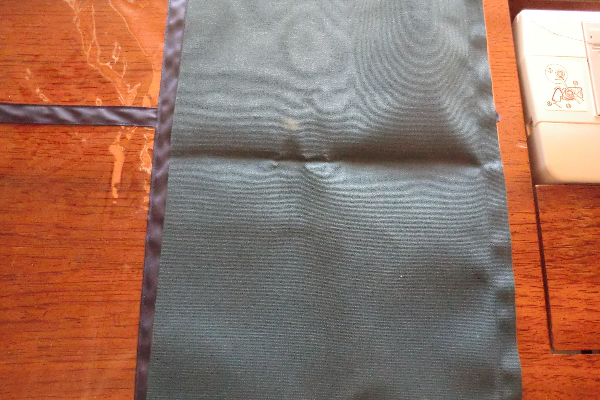
For the front flaps, hem the center edge of each piece.

Overlap the pieces so that they are the width of your table plus 1″ seam allowance. Pin in place at the top where they overlap and then baste.
Not shown: stitch the front panel (consisting of the flaps) to the two window panels. Then stitch the top panel to the rest. I prefer to do this one side at a time.
Hem the bottom edge all the way around.
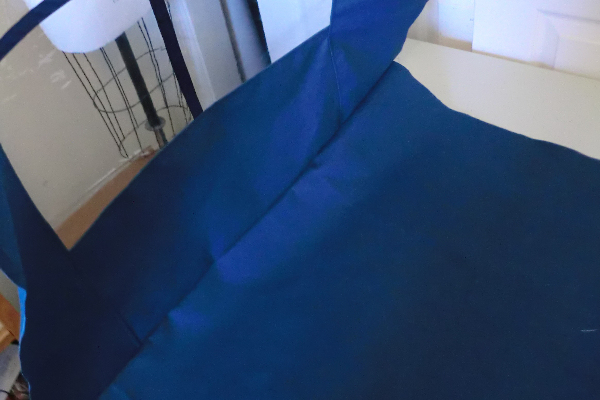
Other views