 [1]Here’s a nifty trick to keep your buttonholes aligned down the edge of a piece of fabric. Use two pieces of masking tape to keep track of either end of your buttonhole. Depending on how you do them, you may only need a piece of tape for the bottom edge. I find this works much better than simply relying on marks made on your fabric with a marking pen because you can see it much better when the presser foot is in place, and also because you get a more consistent, well-measured starting point.
At the bottom is a video showing the automatic buttonhole foot in action, for those who haven’t used one before.
Supplies
 [2]
[2]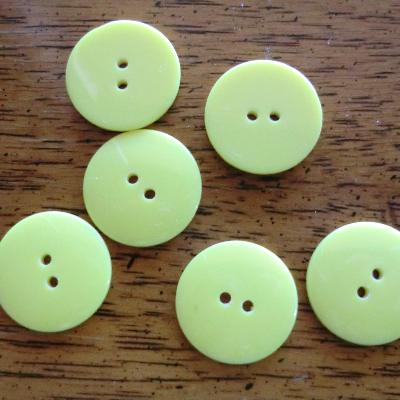 [3]
[3]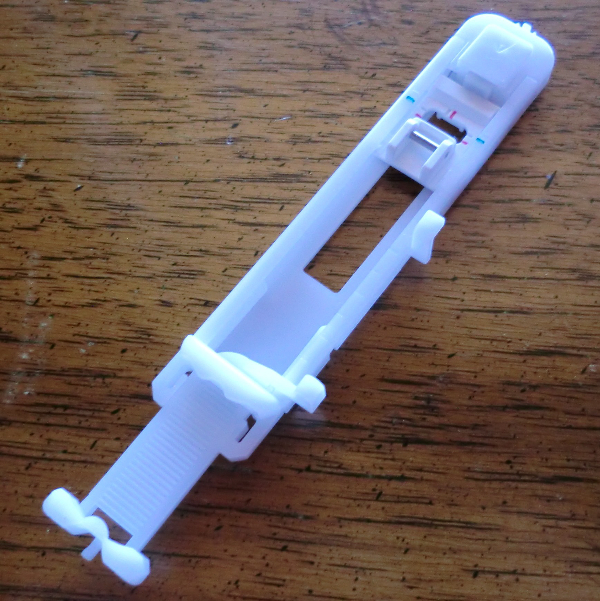 [5]
[5]
The process
 [6]
[6]
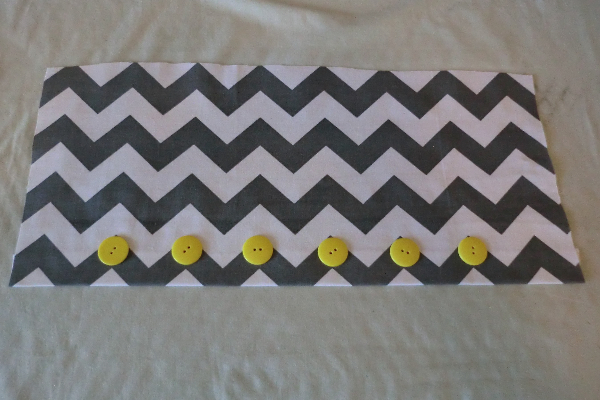
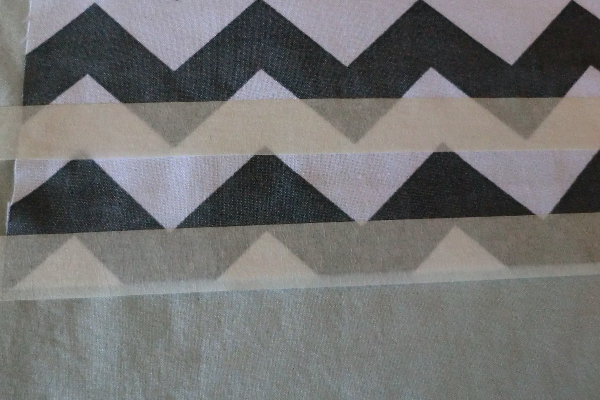
First, figure out where you will place your buttons. Mine were a tiny bit off center, but not noticeably so, and I preferred to keep them on the chevron points.
 [7]
[7]
Measure your buttons and place a line of tape at the top and bottom. Note: My buttons were 7/8″. Add about 1/4″ to the length of your button to determine your buttonhole size.
It’s hard to see, but on the center of each chevron peak, I drew a vertical line between the two pieces of tape where I want my buttonhole to be.
 [8]
[8]
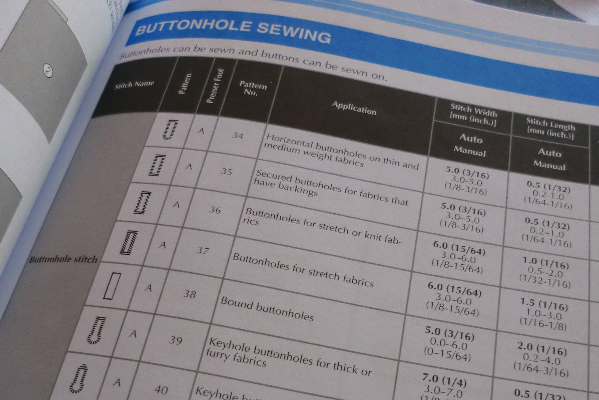
If you weren’t familiar with making buttonholes, refer to your machine manual. I started this project and realized I had not done buttonholes since I got this machine last fall, so I had to check out the book. This is where you’ll find out what stitch function on your machine to use and also what the recommended stitch width and lengths are.
On my old machine, my automatic buttonhole foot had broken many years ago and I had always done the buttonholes somewhat manually using the buttonhole function and a zigzag foot, manually hitting the “return” switch. That method didn’t seem to work on this machine. I show that method in another tutorial [9]. For this one, I’ll be using my automatic buttonhole foot, which is pretty awesome, in fact. I can’t believe I’ve done them manually for so long!
 [10]
[10]
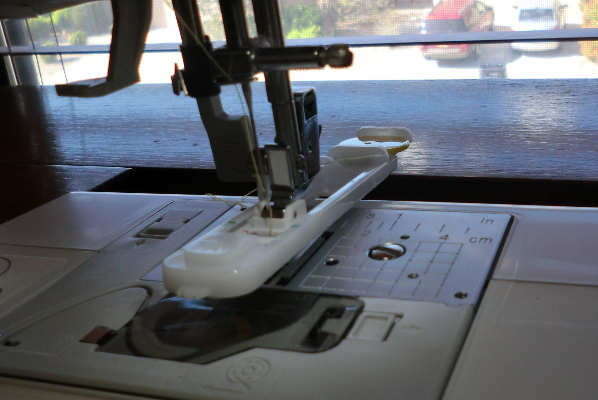
This is the automatic buttonhole foot. In the very back of it, there’s an expandable part where you stick your button and then close it up tight. This will make the machine determine exactly how big your buttonhole must be.
NOTE: please see the end of this tutorial for a video on the automatic buttonhole foot.
 [11]
[11]
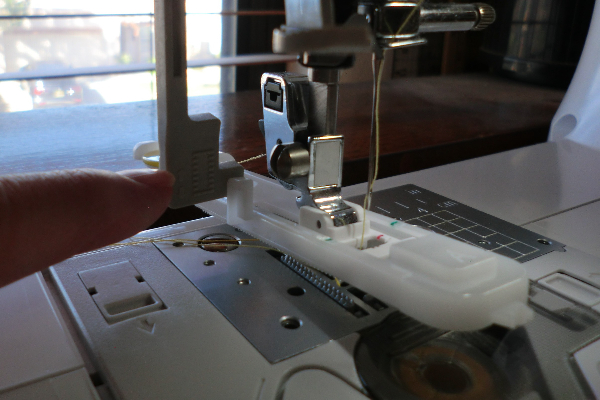
Do you see the little lever my finger is pointing to in the photo above? That little lever gets bumped and tells the machine to turn around and go the other way. On my old machine, when I did them manually, I’d just bump that lever myself when I go to the turnaround point. On this newer machine, that didn’t work. It worked fine when used with the automatic buttonhole foot, however.
So you want to pull that little lever all the way down. Normally it’s resting in an upright position, and you may never have even noticed it if you are new to buttonholes. Pull it straight down. It should rest behind a little piece of the buttonhole foot.
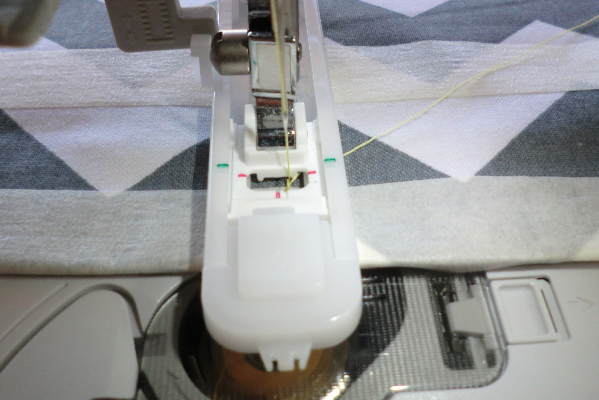 [12]
[12]
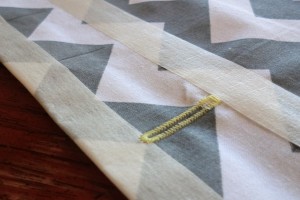
My buttonhole foot has little red marks horizontally and one vertically. These allow me to align my fabric perfectly. This foot is definitely a step above the one I had for my old machine that broke. Those little marks really help. The horizontal marks will line up right with the bottom piece of tape, which marks the bottom of my buttonhole. I do believe that most machines will start at the bottom of the buttonhole and go up. Mine starts with the left and then moves down the right. I align that vertical red line at the bottom with the line I drew on my fabric between the two pieces of tape.
 [13]
[13]
Using my manual, I selected the stitch type and set the width and length of the stitches. Once my presser foot was lined up properly, all I had to do was hold down the pedal and let the machine go to work. It stitched the whole buttonhole without me having to do anything but step on the pedal. When it was done, it stopped automatically. So easy. You can see above that the lower bartack overlapped the tape slightly, but that was fine. The tape tore away without incident. As long as you always line up the tape the same way with your presser foot markings, the buttonholes will be even.
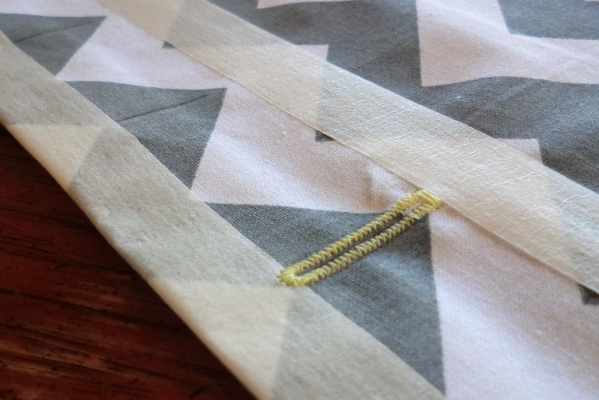
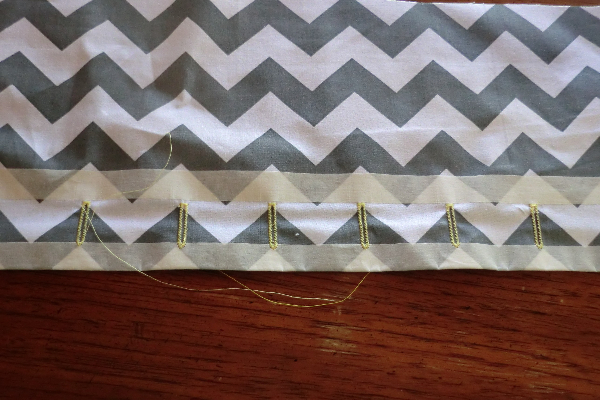 [14]
[14]
And here are my six buttonholes. I mentioned at the top that the top piece of tape might be unnecessary. In the case of an automatic buttonhole foot, you really just need to line up the bottom. But if you are doing them manually like I did for many years, you’ll appreciate that top one to easily tell you to reverse course.
Next week I’ll share the tutorial for the full button pillow project. I’ll add a link here when it’s ready!
Here is a video of the automatic buttonhole foot in action. Warning: I’m an awesome videographer.