
It's no secret that fabrics are often used to make things like quilts, curtains, and gowns, but a younger generation of sewers have also found creative ways to make their very own hair accessories. It isn't as difficult as you might think--and some don't even require a needle! Find out how to make your own hair bows and scrunchies below.
Hair Bows: The perfect hair accessories for young girls.
These instructions will help you create hair bows that are 3.5" long. Here's what you'll need: A piece of cardboard that is 3" wide and 7.5" long, 4 skewers, 1 clip/clothespin, ribbon that is 1-2" wide, ribbon in the same color that is a little thinner than the first, sharp scissors, a ruler, and a pencil. If you want the bow to double as a barrette, you'll also need the barrette of your choice and a hot glue gun.
- Step 1: Slide your 4 skewers into the openings of the cardboard's edge and keep sliding them until they stick out the other side. Make sure the skewers have 1" of room between them.
- Step 2: Use the clip/clothespin to clip your ribbon to the top left side of the cardboard's width.
- Step 3: Moving from the leftmost skewer to the rightmost, weave the ribbon around the skewers. Make sure the ribbon comes over the first skewer, under the second, over the third, and under the fourth.
- Step 4: Fold the ribbon over the top of that rightmost skewer and repeat the same pattern from right to left, making sure the pieces of ribbon don't overlap. In other words, when you fold the ribbon over the rightmost skewer to start weaving again, angle it up in a slightly diagonal position in comparison to the first ribbon section. Since you've already folded the ribbon over the rightmost skewer, you'll continue to move from right to left--the opposite direction from the first section you wove--and use the same pattern: weave the ribbon under the second skewer, over the third, and under the fourth.
- Step 5: Once the ribbon has been folded over the leftmost and rightmost skewers twice each, with as little overlapping fabric as possible, you can stop weaving. However, make sure that the two ends of the ribbon are going in opposite directions before you stop.
- Step 6: Take your thinner ribbon of the same color and place it behind or under the original ribbon and in between the two center skewers, but make sure this second ribbon is laying vertically instead of horizontally so that it's perpendicular to the original ribbon. Ensure that this second ribbon is long enough to hang out above and below the skewered ribbon, with the bottom half of this second ribbon slipping between the first ribbon and the cardboard so that it remains visible.
- Step 7: Take the top portion of the thinner ribbon that sticks out over the skewered ribbon and fold it down over the front of the skewered ribbon. Then, taking that second ribbon by both ends, pull it down toward the cardboard so that the woven ribbon is gathered in the center.
- Step 8: Once the material is gathered tightly near the cardboard, tie the thinner ribbon in a tight overhand knot.
- Step 9: Gently slide the bow off of the skewers in an upward motion.
- Step 10: Trim the ribbon ends either at an angle or in a V-cut to avoid frays. The length is entirely up to you and the look you want.
- Step 11 (optional): Use a hot glue gun to attach the bow to a hair clip or barrette for easy use.
That's it! You can, of course, change up the colors to mix and match as you see fit and even decorate the fabric itself. Like a scarf, the perfect hair ribbon is a fashion accessory and can easily be made from colors that not only complement what you wear but can also be used to catch everyone's attention. Go with bold colors or patterns if that fits your personal style. With a bit of effort and by leaving longer trailing ends, you can even repurpose these bows as an ornament for a dress. That's the best part about crafting at home; you can make it your own!
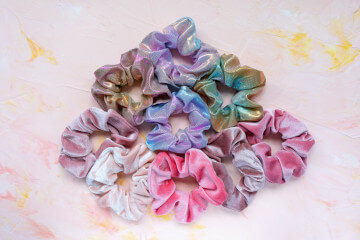
Scrunchies: For stylish ladies on the move.
These scrunchies are perfect for making if you have fabric scraps from other crafts lying around or an abundance of plain hair ties. You can pick whatever kind of fabric you want, but try to remember that you'll achieve the best results from material that is lightweight and NOT stiff. Here's what you'll need: An elastic rubber band/elastic hair tie, scrap fabric, a thread that matches your fabric, fabric scissors, a sewing machine, and either measuring tape or a ruler.
- Step 1: Cut your fabric so that it is 4" wide and 18" long.
- Step 2: Place your elastic rubber band/hair tie so that its center is lying over the piece of fabric's top left corner when the fabric is lying horizontally. Then, fold the bottom half of the fabric over so that the fabric is now half the width, and the hair tie lies between the top left fabric corners. You want to make sure the side of the fabric you DON'T want to be visible on the finished product is the only side visible right now.
- Step 3: You're going to sew along the fabric's open length so that the hair tie disappears inside of the fabric using a sewing machine that's set to perform a single needle stitch. Start sewing 1" from one end and keep sewing until there's 1" left on the other end. Leave a ¼" seam allowance.
- Step 4: Turn the fabric "inside out," leaving the hair tie enclosed but displaying the right side of the fabric.
- Step 5: Take the two short ends of the fabric--that 1" you left on each end earlier--and match them together so that only the underside of the fabric is visible. Then sew the two ends together, again leaving a ¼" seam allowance. Be sure NOT to sew any of the elastic.
- Step 6: Tuck the seam allowance inside and sew the opening closed. Congratulations! You have a scrunchie!
You'll never have to buy hair bows or scrunchies for your daughters, granddaughters, or nieces again. Instead of wearing something bought from a store, they can wear something made with love. Let us know how these projects turn out for you!

