
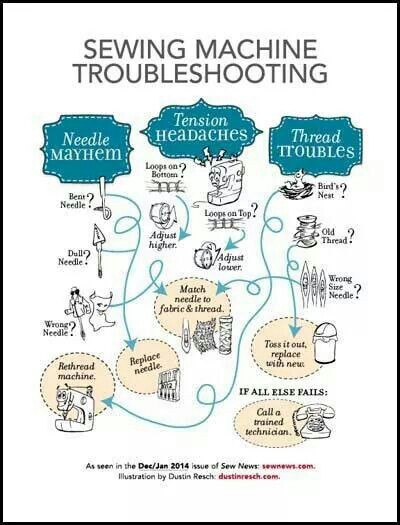
Help! My Sewing Machine Won’t Work! Top 5 Sewing Machine Complaints and How to Fix Them
 Let’s face it. Your sewing machine is your best friend…when it’s working or sitting in the cabinet. But true to Murphy’s Law, the minute you want to finish or even start a project, it’s inevitable that something will go wrong.
Nine times out of ten, it’s just a simple thing. It’s unlikely you’ll experience a major shutdown (except me, of course, when I’m on a deadline…). While most of these time stealers are quick fixes, they can come with a hassle factor of 10+, enough to bring your progress to a grinding halt if you aren’t equipped with some basic know-how.
Here are my top 5 headaches and how to successfully handle them so you can keep the sewing going!
Headache #1 Oh, What a Tangled Thread We Weave…

Like every sewing enthusiast, I dislike spending money on thread. Even at wholesale, good thread is expensive. On my first paid upholstery project, I decided to increase my margin and find a better price on bonded nylon thread. So I found a deal on a “jungle”.com site and ordered with great pleasure, feeling empowered that I’d saved about ten bucks on thread. I quickly discovered, however, that my purchase was an ill-gotten gain and what I saved dwindled to naught as I had to replace the thread I bought due to the inferior quality.
Most problems with inferior thread show up with raveling, breaking, inconsistent stitches, and tangles. Like anything textile related, you get what you pay for. I now swear exclusively by Gütterman for all my upholstery projects.
Another common mistake is mixing thread weight or type. I know, Momma’s vintage thread box beckons, but it won’t play well with your modern thread.
Lastly, don’t use thread that’s too fine or heavy for your needle type. This will always end in tearing out stitches, and probably your hair.
Headache #2 (and my personal “favorite”) The Birdnest
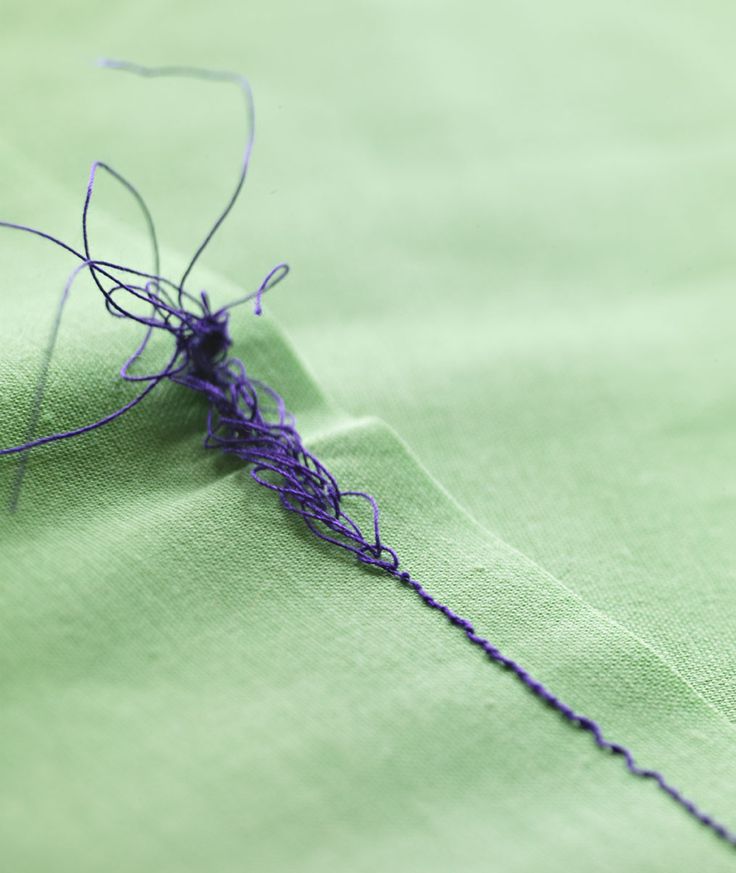
You know this one well, I’m sure. First, don’t panic, and don’t pull. The first solution is to stop and remove the fabric. I keep a razor blade or a snap-cut for just such an occassion. Lift the presser foot and slide the edge just between the fabric and the presser foot so it knicks and cuts the thread without damaging the fabric. From there, clean up the mess on the underside of your project by knicking and clipping the nest and carefully removing the tangled web you’ve woven. You’ll probably have some broken threads inside the bobbin casing. MAKE SURE YOU CLEAN THAT UP!! While you’re in there check for dust and fray. It’s crazy how a little dirt can muck up the system.
Bird nests are usually caused by tension on the top thread that isn’t quite tight enough. Making a slight adjustment to tighten the top thread should solve this. On the other hand, it could be caused by neglecting loose threads from a previous seam rip, backstitching over your top thread, or dust in the bobbin case that gets in the way of the bobbin hook catching the top thread so it can knot with the bobbin thread. It’s a safe plan to just take the bobbin and the top thread and re-thread them.
I also find that from time to time, my thread gets wedged in the tension plates located on the tension knob that prevents the top thread from advancing. I’ve even had my thread get caught in the spool where the manufacturer has knicked it to hold the loose thread. Usually that results in a broken thread.
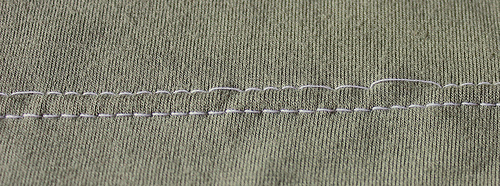
Headache #3 Skippity-do-dah Skippity-ay… Skipping Stitches Really Brings Down My Day
Whhyyyy!!???
Well, simply put, skipped stitches means the needle thread isn’t engaging with the bobbin thread. The cause is just a matter of deduction.
First question: does your project match your needle? A common mistake. For example, if you’re sewing on knit, you have to use a needle made for knit. Are you trying to sew something too thick? Using the proper needle could be the answer. See the chart below for help on that
Usually , skipped stitches are a matter of tension, which we just discussed. So again, not the kind giving you a headache over the issue, rather the kind that affects how much the top and bottom threads are in sync.
Here are some quick troubleshooting fixes:
- Change the needle
- Rethread the machine
- Rethread the bobbin (not because it’s the problem, but because it’s probably snarled up)
- Decrease or increase the stitch length slightly
- Slightly increase or decrease the top thread tension
- Let the feed dog work for you, don’t work against it by pulling the fabric.
- Slow down. It’s not a race, and sewing with your thread on fire can challenge your bobbin engagement or put you into a scenario that needles get bent or broken.
Which brings me to …
Headache #4 Bent or Broken Needles… Oh bother
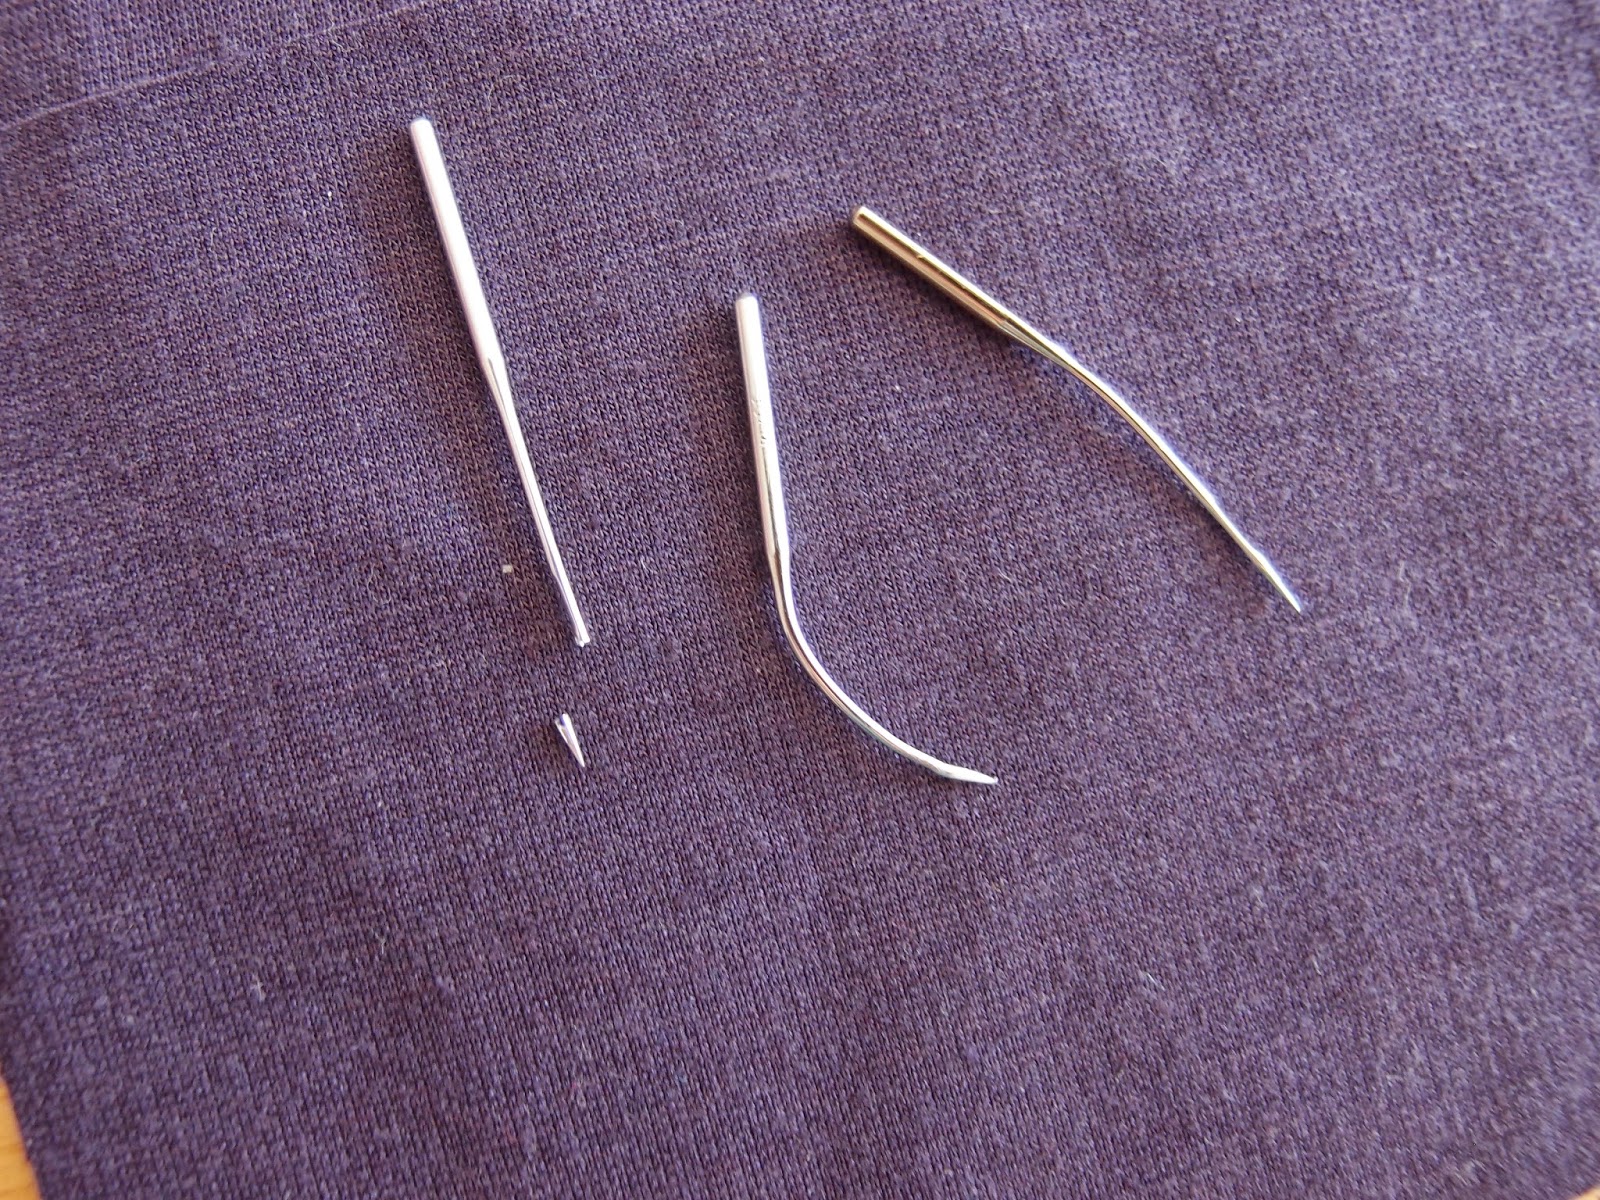
Let’s all grab a pillow, face plant, and utter a cathartic release at once for this. Feel better? Repeat as required. Was it your last needle? Oh honey… I’ve been there. I feeeeeel your pain. This may require more aggressive measures.
First rule: buy good needles and use the one rated for your project. I’m not endorsing over brand over another, but I will go on record to say that cheap needles will fail you.
Second rule: new project=new needle. Needles are like tires, they wear down. Experts recommend a new needle good every 16 hours of use.
Third rule: Don’t send a boy to do a man’s job. Trying to make a ball point knit needle cut through leather because it’s the only one left; while I get that, it won’t work. The right tool for the job.
Fourth rule: Rules, schmules…If broken needles are a common event, you should ask an expert. Your machine could be out of alignment; kind of like hitting too many potholes.
To help you out, here’s a quick reference guide:
| Fabric Note that this isn’t an exhaustive list. These are common examples by weight | Machine Needle Type | Machine Needle Size |
| Sheer to lightweight: Batiste, Organza, Lame | Regular Point | 9/70 or 11/80 |
| Lightweight: Challis, Chambray, Charmeuse, Crepe de Chine, Gauze, Handkerchief Linen, Silk, Taffeta, Tissue Faille. | Regular Point | 11/80 |
| Medium-weight: Broadcloth, Brocade, Chino, Chintz, Corduroy, Flannel, Linen, Poplin, Satin, Synthetic Suedes, Taffeta, Terry, Velvet | Regular Point | 14/90 |
| Medium to Heavy-weight: Coating, Damask, Drapery Fabric, Fake Fur, Gabardine, Ticking, Woolens, Upholstery Fabrics | Regular Point | 16/100 or 18/110 |
| Denim and Canvas | Denim/Jeans | 16/100 |
| Sheer to Lightweight Knits: Jersey, Single Knit, Spandex, Tricot | Ball Point | 10/70 or 12/80 |
| Medium to Heavy-weight Knits: Double Knit, Sweatshirt, Sweater Knit | Ball Point | 14/90 |
| Specialty Fabrics: Leather, Suede, Buckskin | Wedge Point | 14/90 or 16/100 |
 Headache #5 Got Tension?
Tension.
The great unknown.
A valley of confusion.
A class 5 headache.
Are we sensing a theme here? Tension is a big part of sewing headaches. So stay calm. Sew on and Relax! It’s not as complicated as you think.
In simple terms, Tension is a dance played between the top thread and the bobbin thread. Like dancers, they step in sync to create lovely stitches like little steps. But when one isn’t cooperating, the result is messy. As both partners step in rhythm with the music, the dance is beautiful. Keeping the dance flowing requires knowing which partner is out of step. A trick you can use is to put two different colors of thread on the top and bottom and use a light colored fabric. Stitch as usual. Using the chart below, determine your issue and adjust accordingly.
Normally speaking, you don’t have to make adjustments all the time. Most machines sew well on the same setting. But occasionally, it will fall out of adjustment. Your machine might also have a bobbin tension screw that allows the bobbin thread to be adjusted. Be careful with this. The only time I change this is when I’m working with heavy upholstery thread and loosen it slightly. In this case, I also make sure my top thread is tensioned to match. Just don’t forget to put it back when you’re done. I’d recommend making a mark with a Sharpie so you remember the original setting.
Tension might be part of the problem, but the problem might be an operator issue.
- You might be trying to sew too many layers at a time. This isn’t a tension issue, this is a technique issue. Unless you have an industrial machine, more than 4 layers of heavy fabric is probably not happening.
- And what’s that thing called a feed dog? It’s the little feet that walk your fabric across the throat plate. If the fabric won’t move or you pull too hard, this can mess up your stitches or create a little jam up underneath.So remember to let the dog do the walking. And if doggie ain’t a walking, check his collar!
(A little note here, I did actually have a situation where the screw inside my machine that held the feed dog in place managed to work itself loose. This is not a common occurrence; however, if you’re working vintage like me, it can happen.)
Did you know you may have the option to adjust your presser foot? Yes, you can adjust the tension knob to make struggling with challenging fabrics a thing of the past! The knob is usually on the left side if you’re facing your machine. It might have a picture of the presser foot or just be a knob, screw, or dial. Older machines (pre-1960) might have a screw on the very top. Your machine may or may not have this option, so consult your owner’s manual. Mine, a 1966 Singer Touch and Sew, has a dial inside the panel cover on the left. It’s set to “4” and I’ve never adjusted it, even on heavy upholstery.
Every situation is unique. For heavier fabrics, you’ll want less tension so the fabric can move easily with the feed dog. For lighter, more delicate or slippery fabrics, you’ll want more tension. You’ll have to experiment with a scrap to find the right balance. You’ll be amazed at the difference this simple trick can do for your work. Not to mention, less tension headaches!
A final note, take time to love your machine. Like your vehicle, it will only perform well if it’s maintained well. Clean up after each project. Dust out the bobbin case with a brush designed for this purpose or use canned air to blow it out good. Keep it oiled as the manufacturer recommends. Don’t overwork your machine. Know its specifications and limitations. When all else fails, see a certified expert. Sadly, they’re getting harder and harder to find. If you can find one in your area, a good overhaul is a worthwhile investment, on average about a $100. That’s money well spent in the long run.

